Punch Walls To Escape Wall Layers and Escape Hole Guide
Last updated:
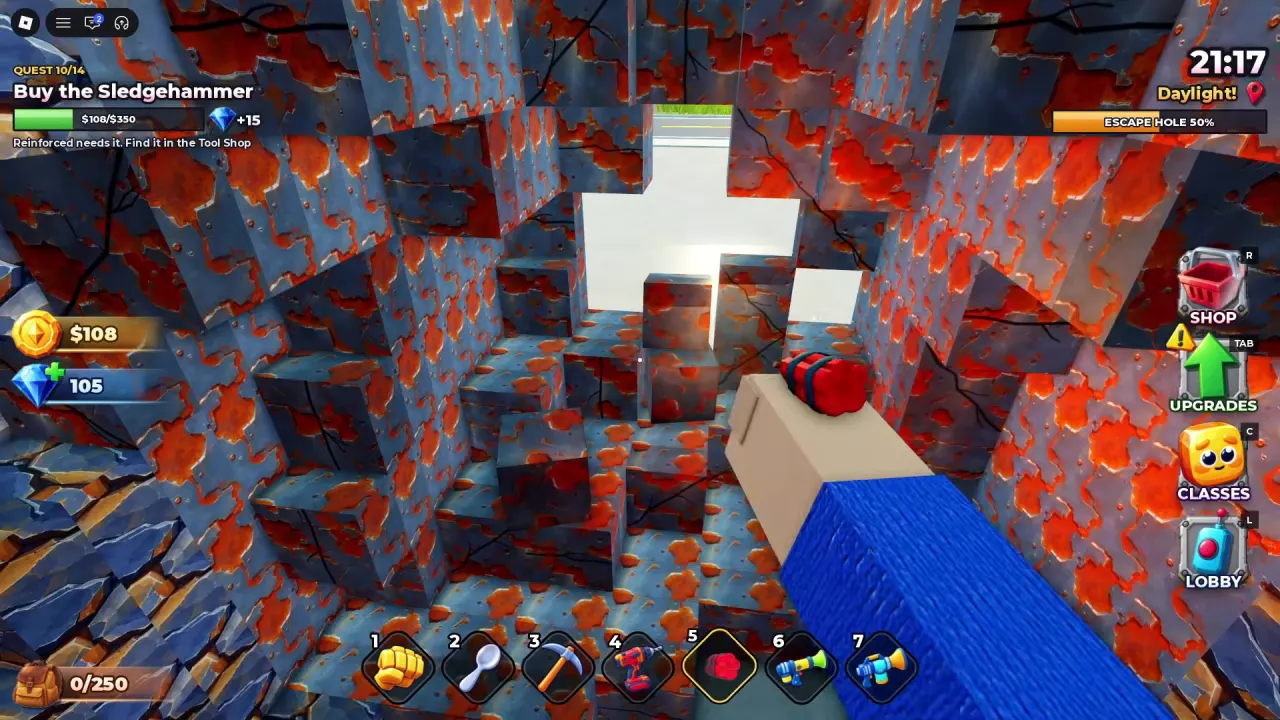
Follow the LAYER indicator from your first punches in Drywall to the Steel wall. Collecting and selling rubble funds your tools along the way, and reaching Daylight starts the work of widening the escape opening.
Quick Answer
The wall order is Drywall → Brick → Concrete → Reinforced → Steel. Start with Fists, buy the $50 Spoon for early digging, and use Pickaxe through the middle layers. For Steel, combine Drill with Dynamite and drill between blasts. After Daylight appears, keep removing the upper beam, edges, and remaining side blocks to advance ESCAPE HOLE progress.
Wall Layer Order
In the route with the LAYER indicator, the five wall materials appear in this order:
- Drywall
- Brick
- Concrete
- Reinforced
- Steel
Use that indicator to track which material you are breaking through. After Steel, Daylight marks the exposed outside, and ESCAPE HOLE tracks the opening you still need to enlarge.
Start with Fists and Buy the Spoon
Your first tool purchase is the $50 Spoon. Earn the cash by turning broken wall blocks into a load you can sell:
- Approach Drywall with Fists equipped and click the wall to punch it.
- Select Vacuum from the hotbar and collect the fallen rubble. Breaking blocks alone does not put them in your backpack.
- Carry the rubble to the Crusher. Click the machine or press E nearby to sell it.
- Let the Crusher process the load under its CRUSHING status, then return to the wall and repeat until you have $50.
- Buy Spoon from the Tool Shop rack and select it from the hotbar.
- Use Spoon to dig through Drywall and continue into Brick.
When your bag fills, follow the selling prompt or ground arrows back to the Crusher. For processing upgrades and selling details, see the rubble-to-cash guide.
Use Pickaxe Through Brick and Concrete
Buy Pickaxe for $150 with the THIS RUN option to continue through Brick and Concrete.
- Approach the Pickaxe rack in the Tool Shop and press E to view it.
- Choose $150 — THIS RUN.
- Equip Pickaxe from the hotbar, aim at wall blocks, and swing.
- Work forward through Brick and Concrete, clearing overhead blocks when they restrict the passage.
- Collect loose rubble and return to the Crusher whenever your bag fills.
If frequent selling trips interrupt your digging, compare bag capacities and upgrade costs. For spending cash on the tool itself, consult the Power, Speed, and Reach upgrades.
Reinforced Walls and the Sledgehammer Quest
Pickaxe and Drill can both continue breaking Reinforced walls. You can keep opening the passage with either tool even while the Sledgehammer purchase quest is active.
To complete Buy the Sledgehammer, however, you must make the purchase. Save $350, follow the quest arrow to the Tool Shop, and buy Sledgehammer. READY TO BUY means you have enough cash; it does not complete the purchase objective.
Treat wall progress and quest completion as separate goals here: digging advances the passage, while buying the requested tool completes that objective. See the wall-route quest conditions and Gem rewards for the full task table.
Break Steel with Drill and Dynamite
Use Drill for sustained contact and Dynamite to blast a larger space. Combining them is a practical choice for Steel: the explosion opens up the wall, and drilling keeps you working during the cooldown.
- Press E at the Drill rack in the Tool Shop and buy the $750 — THIS RUN option.
- Select Drill from the hotbar. Hold the drill bit against the wall and keep drilling.
- Obtain Dynamite from its shop display, using the E View prompt to open its entry.
- Equip Dynamite and use it near the wall to blast out a larger opening.
- Switch back to Drill while Dynamite recharges. Dynamite can be used again after a few seconds.
- Switch to your vacuum to collect the loose rubble, then resume breaking the wall.
Drill's shop description lists seven drilling hits per second and identifies Steel as a suitable target. For other equipment options and purchase conditions, see the tool directory.
Keep Clearing After Daylight Appears
Seeing outside does not mean the opening is finished. Once Daylight appears, follow the ESCAPE HOLE progress bar and keep enlarging the gap.
- Aim Drill upward to remove the upper beam and blocks hanging over the opening.
- Work around the opening's edges, removing blocks that narrow the gap.
- Clear the remaining side blocks rather than concentrating all your drilling on the already-open center.
- Vacuum up the fallen rubble and continue clearing the perimeter as ESCAPE HOLE progress advances.
Use the visible blocks around the gap to choose your next target. An open view through the center can still leave substantial wall material above and beside it.